Faxing with the Cloud9 Portal
The first step is to login into the Cloud9 Dashboard. Login information is sent to office managers in the “Admin Information” word document. However, if you need your password reset or you can’t find the “Admin Information” document then you can email support@getcloud9.com with the following information:
-Subject of the email set as “Portal Password Reset”
-Company Name
-Name
-Extension
-Email to send password reset email to.
Once you’ve logged into the dashboard, you will want to navigate to the Fax tab.

From here you will be able to see all of your received faxes. You will also receive an email notification of a received fax along with the faxed documents to the email address attached to your user.
Received/Sent inbox : If you click on the “Inbox” drop down then it will allow you to switch to the “Sent” inbox. In this inbox, you will be able to see any faxes sent out and the status of the sent fax.
Fax Options : Every fax has the option to Download, View, and Delete. Hovering over each out the buttons will show you the function of the button.
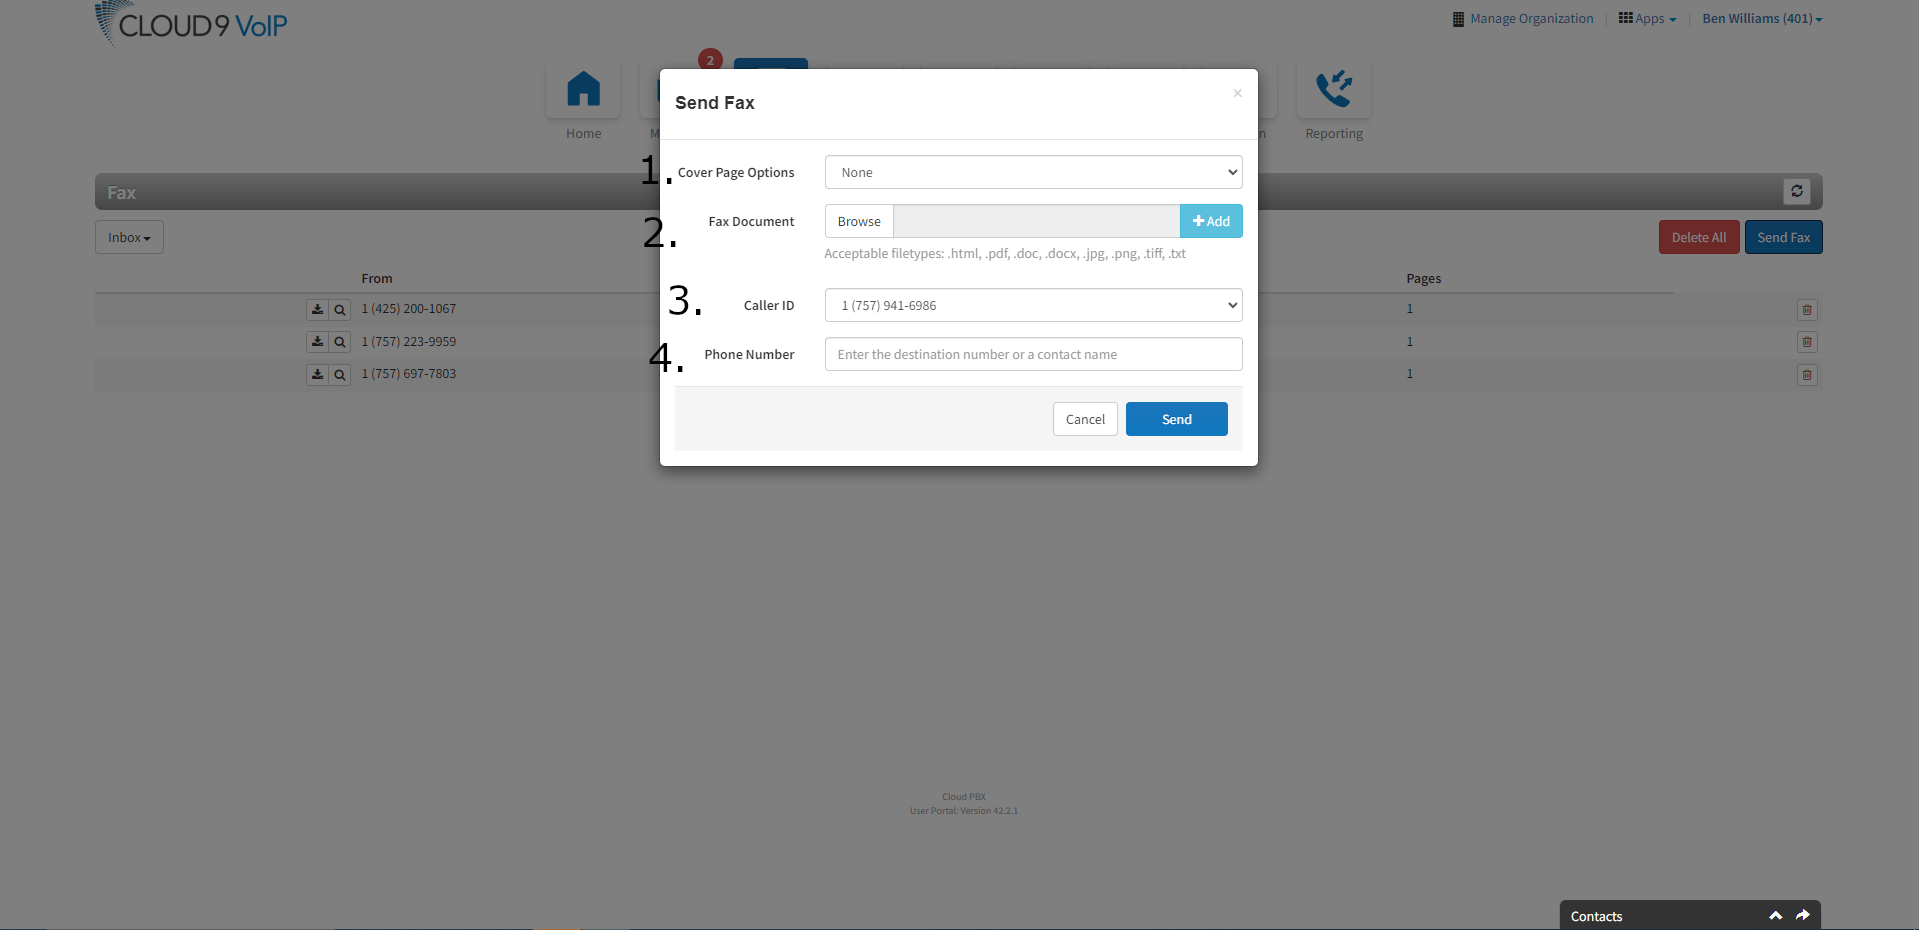
Number 3 is the Send Fax button. When you click on it, a new menu will pop up.
Cover Page Options : This will allow you to either compose a text cover page or upload a document for your cover page.
Fax Document : Clicking on the “Browse” button will allow you to search for acceptable file types in your file explorer. Clicking on “Add” button will allow you to fax up to 5 separate documents. NOTE : FAXING MORE PAGES/DOCUMENTS INCREASES TIME IT TAKE TO SEND.
Caller ID : Your caller ID for your fax or the fax number you are faxing out of.
Phone Number : The fax number you are trying to fax to.